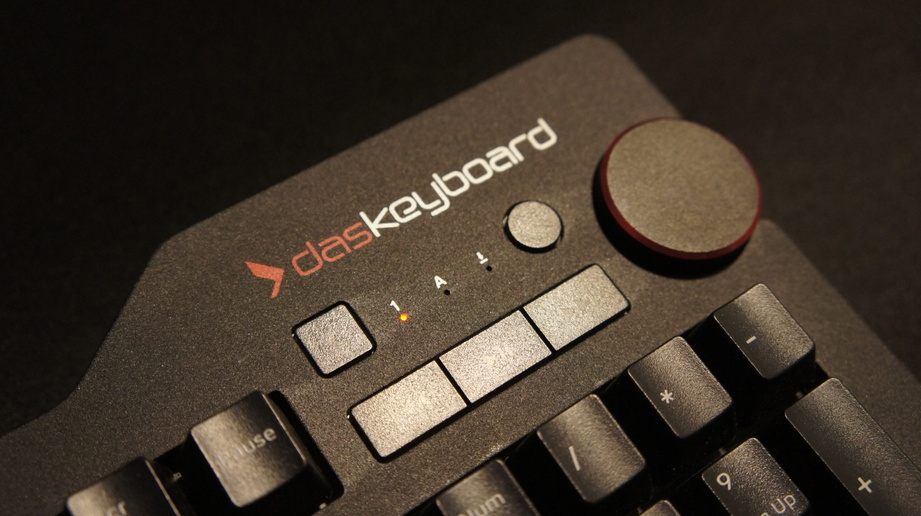
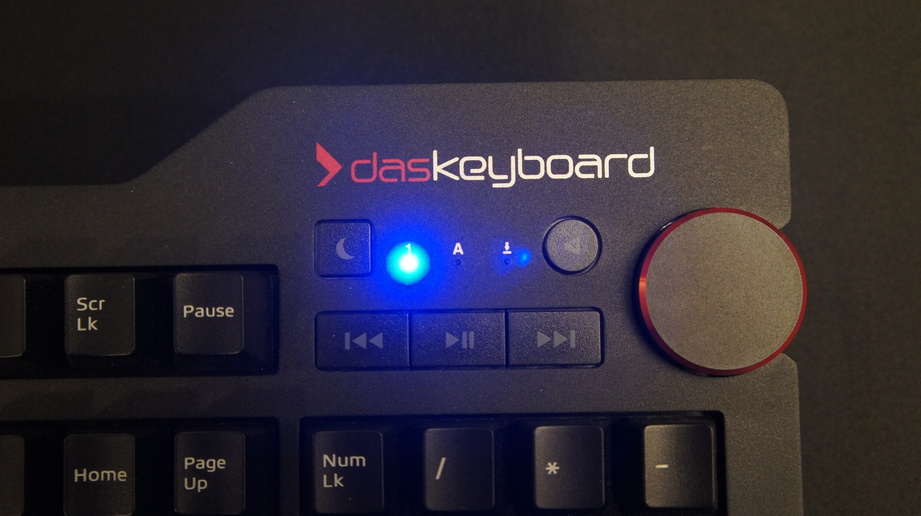
I’ve had my Das Keyboard 4 Professional (with blue switches) for a few months now and I am enjoying it, especially after adding blue rubber band dampeners.
There’s just one problem: obnoxiously bright blue LED indicator lights.
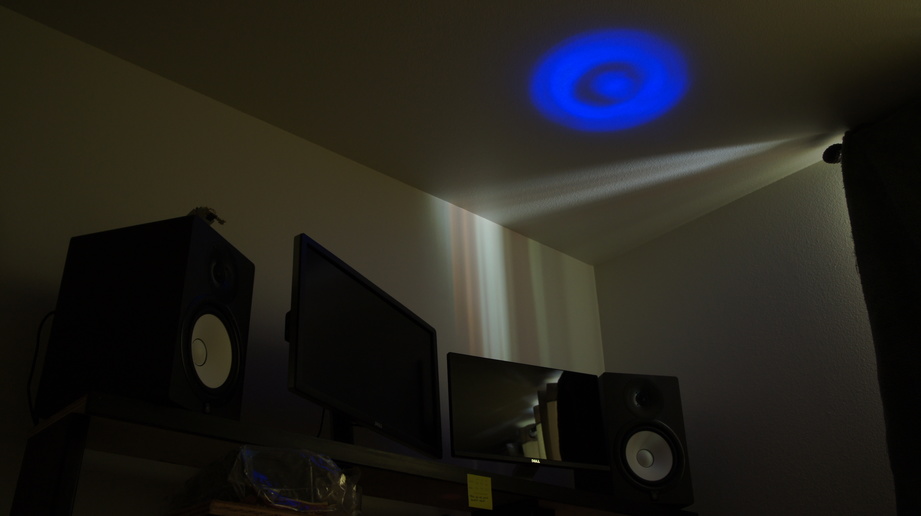
That’s what my office ceiling looks like at night.
These LEDs are so bright they even give off a lens flare, and they’ll certainly make you see stars if you happen to ever be standing over the keyboard and catch a glimpse of their powerful beam.
Luckily, there’s an easy and inexpensive fix that only took me about an hour.
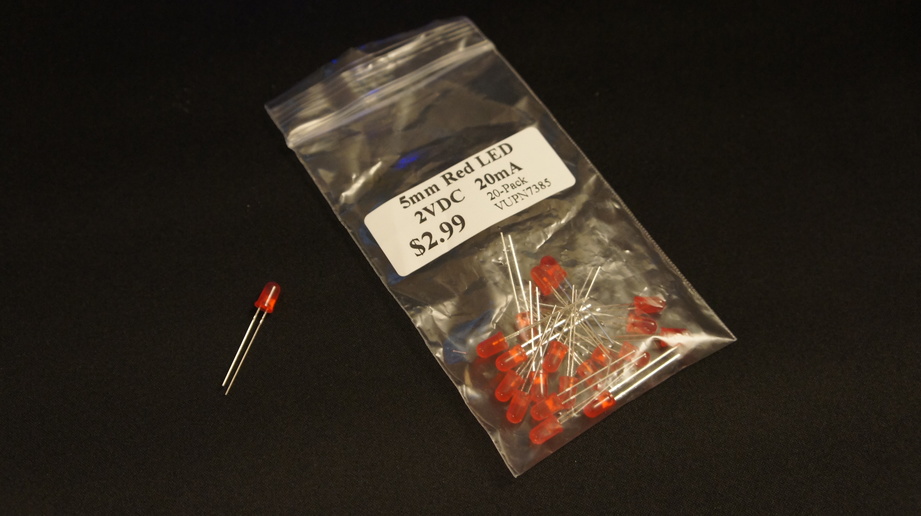
Replacement LEDs are cheap and last basically forever. I found a 20-pack for $3 at a local electronics store. You’ll need three 2VDC, 20mA LEDs.
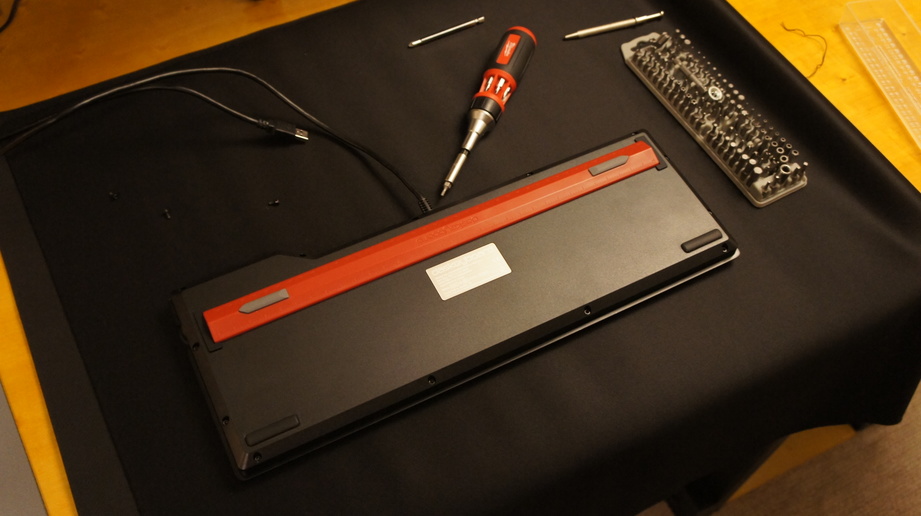
Dismantling the keyboard
It’s pretty straightforward to dismantle the Das Keyboard. Disconnect the keyboard, set it upside down on a soft surface, and use a hex-head bit to unscrew the 13 screws around the case perimeter.
Flip the keyboard over. Lift the top cover off slowly as it’s connected to the base by a ribbon cable. My keyboard didn’t appear to have a ZIF connector, so a gentle tug straight out removed the ribbon without tearing or damaging it.

The top is also connected to the base with this relatively fragile grounding wire. Simply unscrew it and the top should now be completely free from the base.
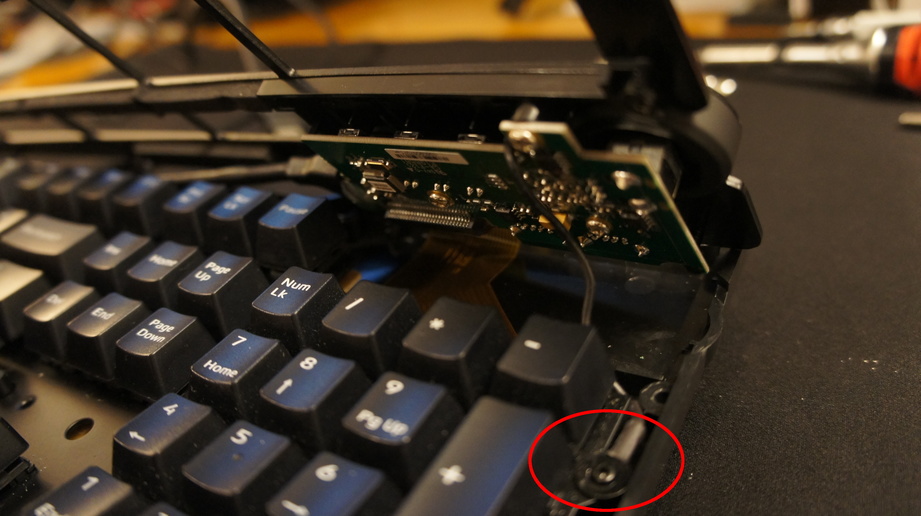
Set the base aside and then flip the top cover over to get a look at the circuit board.
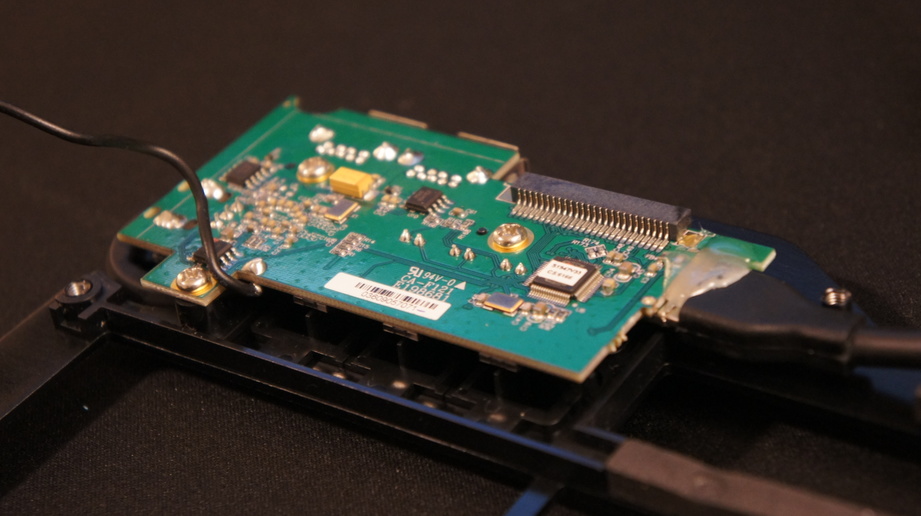
The circuit board is connected with three screws. Remove them and then you can have full access to the board.
Replacing the LEDs
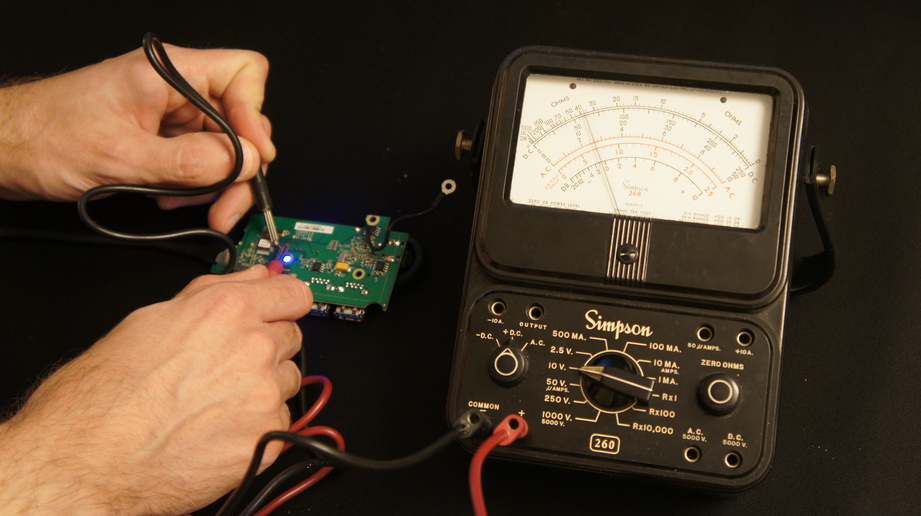
Time to break out the electrical meter I inheritied from my Grandfather, the same one he used for work way back in the day. I was able to confirm that the LEDs are running at 2.5V, so the ones I bought at the store will work just fine.
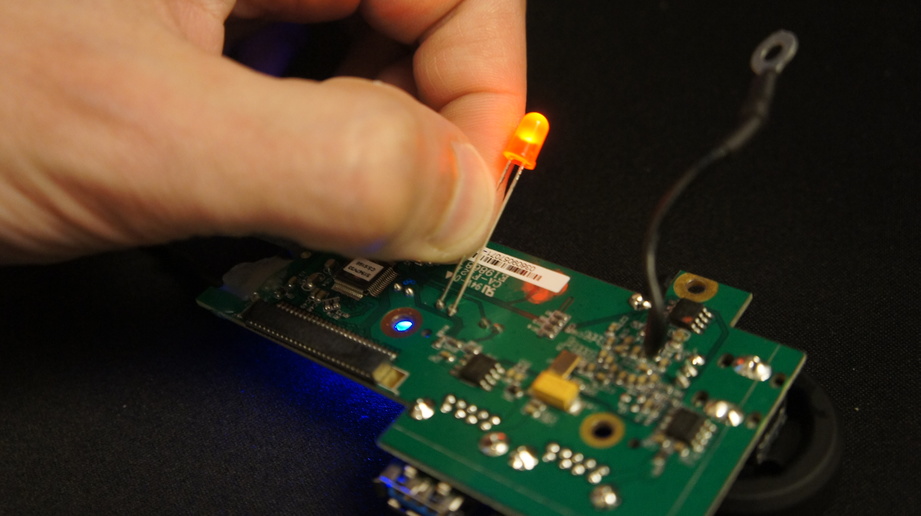
Luckily my partner is a pro at soldering. He taught me how to unsolder and replace the LEDs without ruining the board and even let me help while he used the solder iron. YouTube also is a great place to check out for instructional videos. Our solder iron was temperature-controlled and we found that the existing solder used to secure the blue LEDs required a heat of 425°F to melt.
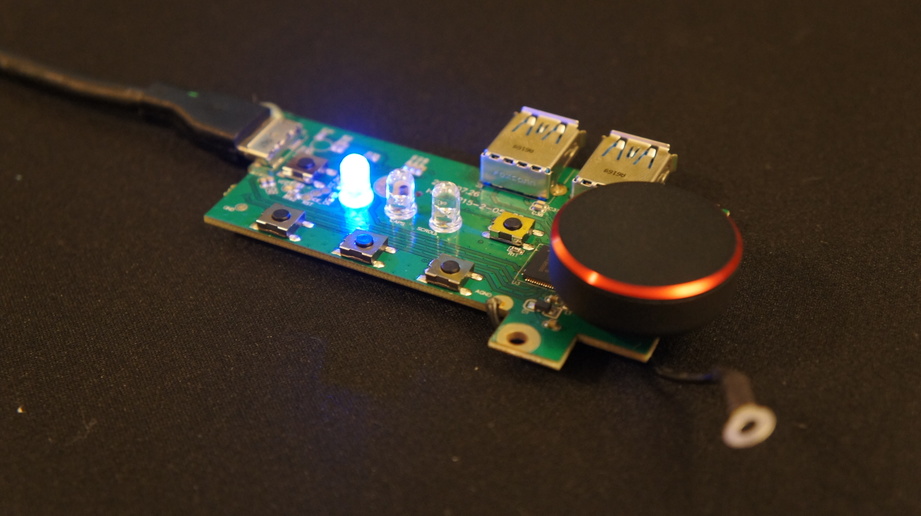
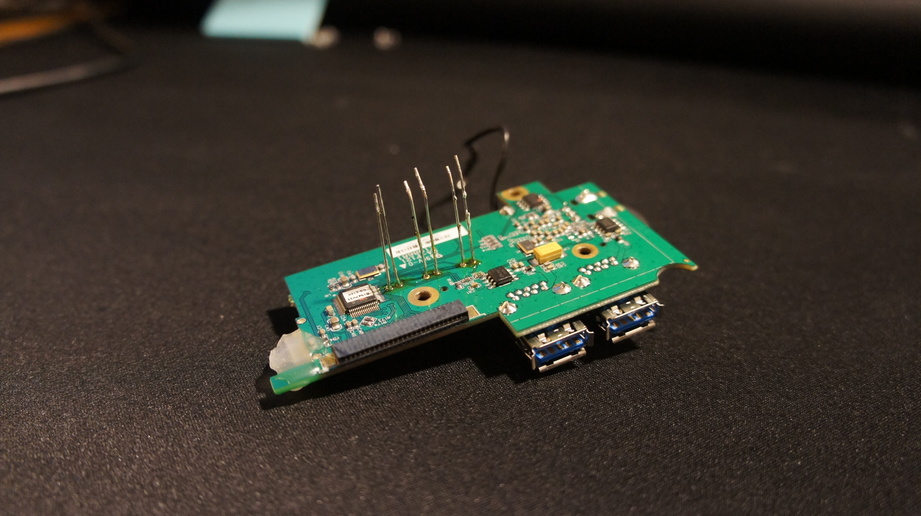
15 minutes later we had swapped out the LEDs, and here’s how it turned out.
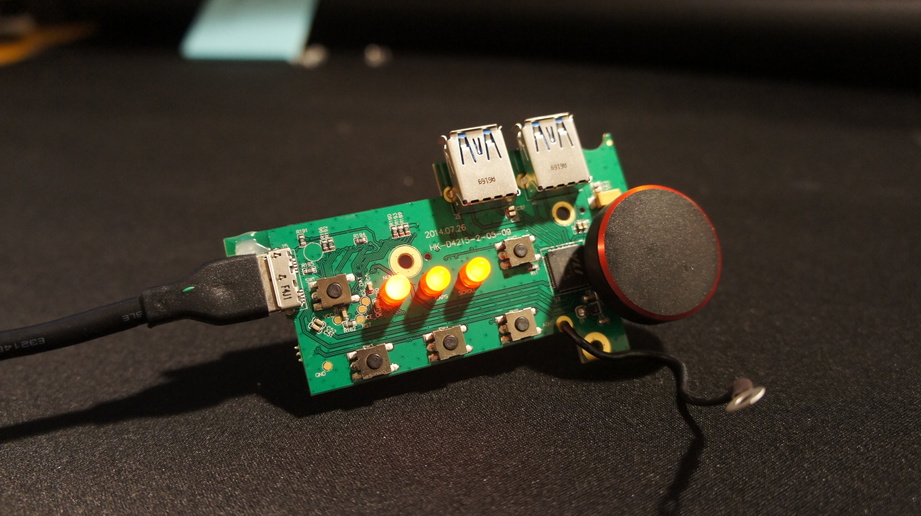
Make sure to test out the board before you reassemble the keyboard. You can test the LED indicators on the standalone Das Keyboard circuit card by plugging in a second USB keyboard to the computer and hitting the Caps Lock and Num Lock keys on the other keyboard (indicators on both keyboards will change). While I couldn’t get Scroll Lock to light up (when does it ever?) you should be able to see all three LEDs turn on briefly when you first plug in the Das Keyboard.
Once you’re sure you’ve got everything working, snip the excess wire off the back of the LEDs and reassemble the keyboard.
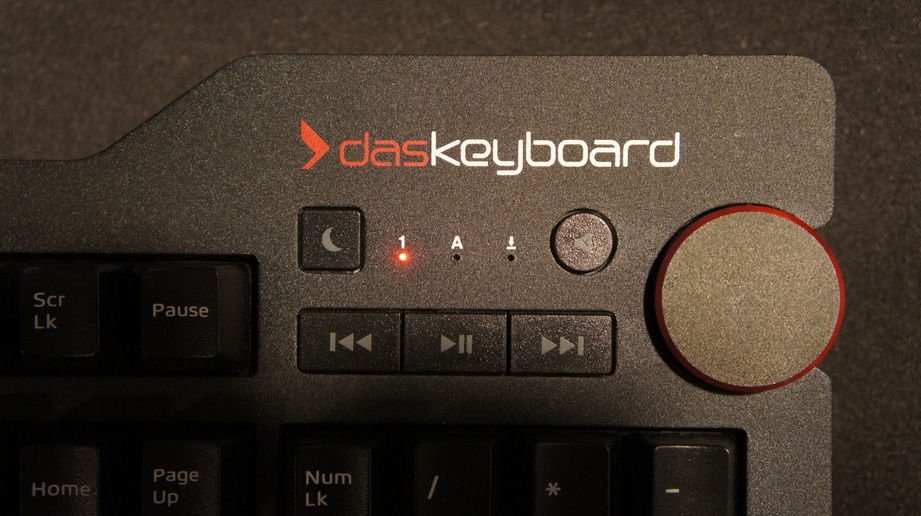
The toned-down red LEDs make the keyboard look way more professional. The red color LEDs match the red trim and accents that are already on the keyboard. And best of all, that huge blue lightshow on my ceiling is gone.
The Das Keyboard 4 Professional is a sexy keyboard already, but with this small tweak it became a damn sexy keyboard.